
Yours truly is old enough to have been around when digital samplers first arrived. Admittedly I never touched a Fairlight or an Emulator back when they were fresh from the factory – those products were way out of a teenager’s league – but I distinctly remember the first time I laid hands on an S612, Akai’s first sampler. Its modest 128 kB RAM could hold a single 1-second sample at maximum quality (32 kHz) – but none the less it was pure magic to be able to record something with a mic and instantly trigger it from the keyboard. I spotted that particular Akai sampler hooked up in my local music store, and tried it out by sampling myself strumming a chord on a Spanish guitar. My first sample…!
As the years went by, I gradually became spoiled like everyone else; there were tons of high quality sample libraries available on floppies, and soon enough the market was swamped with dedicated sample playback instruments such as the S1000PB, the E-mu Proteus, the Korg M1 and the Roland U-series to name but a few. This trend carried over into software instruments; manufacturers and others kept sampling like crazy for us so it seemed more or less superfluous to do it yourself. Propellerhead was no exception – with no sampling facilities and no hard disk recording, Reason remained a playback device for canned samples for almost 10 years – but in Reason 5 and Record 1.5, they got around to adding a sampling feature. In typical Propellerhead fashion, don’t do it unless it’s done right. The trick to doing it right was to bring back the simplicity and instant gratification of those early samplers – just plug in a source, hit the sample button, perform a quick truncate-and-normalize in the editor, and start jamming away.
Setting Up for Sampling
The sampling feature is part of the Audio I/O panel on the hardware interface. On the front panel there’s an input meter, a monitor level control, a button for toggling the monitoring on/off and an Auto toggle switch – activate this and monitoring will be turned on automatically while you’re recording a sample (figure 1).

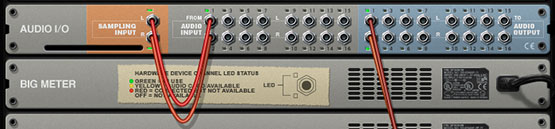
On the back, there’s a stereo input for sampling and this will be hooked up to audio inputs 1 and 2 by default. In case you’re sampling a mono source such as a mic, and the source is audio input 1, make sure to remove the cable between audio input 2 and sampling input R – otherwise you’ll get a stereo sample with only the left channel (figure 2).
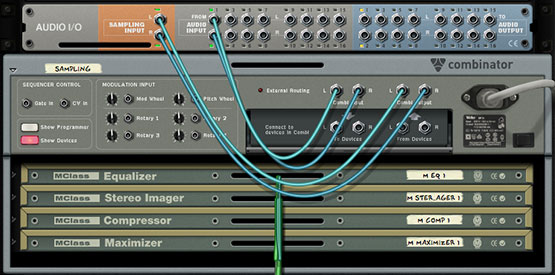
Now, if you’re sampling with a mic you may want some help with keeping the signal strong and nice without clipping, and perhaps a touch of EQ as well. In that case you can pass the mic signal through Reason devices such as the MClass suite and then sample the processed signal (figure 3).
Sampling devices or the entire rack
You might wonder “hey, what’s the point of sampling Reason itself when I can just export an audio loop?” Well, there are situations where that method just doesn’t cut it. A few examples:
- When you want to sample yourself playing an instrument, singing, rapping or scratching, you’re running the audio through Reason’s effect units and you want to capture with the sample.
- When you want to edit something quickly without leaving Reason, for instance if you want to reverse a segment of your song or reverse single sounds such as a reverb ‘tail’. Just wire it into the sampling input, hit the sample button on the Kong/NN-XT/NN19/Redrum, pull up the editor, reverse the sample, done.
- When you want to sample the perfect ‘snapshot’ of instruments doing something that’s non-repeatable, for example when a sample-and-hold LFO happens to do something you wish it would do throughout the entire song.
- When you’re doing live tweaking that can’t be automated, such as certain Kong and NN-XT parameters.
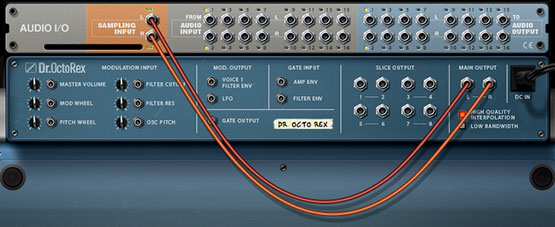
It’s a straightforward process where you simply take any Reason devices you want to sample and plug them into the Sampling Input. In this illustration, Reason has been set up to sample from a Dr. OctoRex (figure 4).
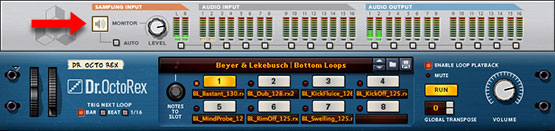
When you sample straight from the Reason rack, you’ll want to make sure to enable the monitoring, because unlike situations where you sample an external acoustic source, you’ll hear absolutely nothing of what you’re doing unless monitoring is enabled (figure 5).
Sampling the computer’s audio stream
For both PC and Mac there are utilities that allow you to pass audio from one application to another. One of the most popular alternatives for Mac is Soundflower by Cycling ’74, another is Audio Hijack Pro. For PC there’s Virtual Audio Cable and Virtual Audio Streaming, and then there’s JACK for both platforms.
These utilities let you sample just about anything straight into Reason: iTunes, Windows Media Player, YouTube, Spotify, anything with audio (including other music and audio applications of course). Now let’s have a look at using one of these utilities, SoundFlower — the setup procedure is similar for all these utilities, whether on PC or Mac (consult the included documentation for specifics).
After installing SoundFlower, start up Soundflowerbed (it’s in the application folder). Now you should have a flower icon on the Menu bar. Pull down the menu and make sure that the built-in output is selected in the Soundflower 2CH section: (figure 6)
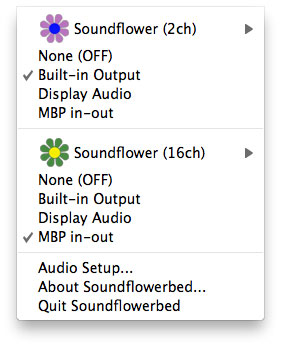
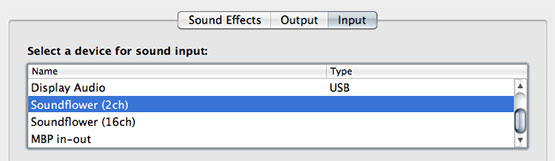
Next, open System Preferences and select “Soundflower (2ch)” as both input and output:
And finally, open Reason Preferences and select Soundflower (2ch) as the driver on the Audio tab:
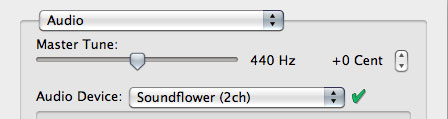
Now you have set everything up so that Reason can tap the audio stream, and anything playing back over the built-in output can be sampled. Though in this particular example, do not enable monitoring on the Sampling Input panel since this will create a feedback loop!
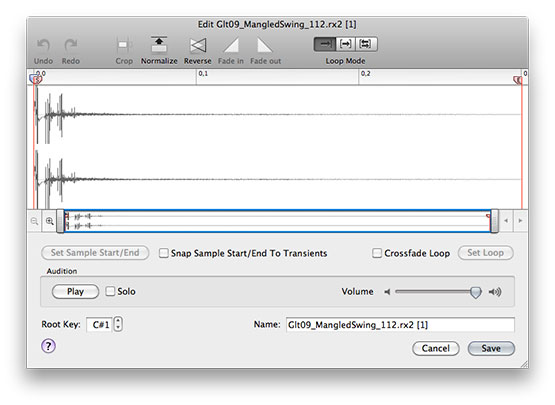
The Sample Editor
The editor is very simple and straightforward to use — it lets you trim, reverse, normalize and loop samples – so we won’t go through the basics here. Instead we’ll explore the fact that you can edit not just your own samples, but even those contained in ReFills, and the edited samples can then be self-contained in song files so that you can share songs without the recipient owning the actual ReFill(s).
So, any sample you load into NN-XT, Kong, NN19 or Redrum can be edited manually. This means that you can also edit individual REX slices, since those can be loaded as patches into NN19 and NN-XT. While the new REX player DR. OctoRex lets you reverse individual slices, it doesn’t always yield the desired results since there’s often a very long ‘tail’ at the beginning of the slice so it has to be triggered way in advance. And sometimes there are ‘bad’ slices that aren’t trimmed properly, end too abruptly, and issues like that. But by editing the slices manually you can shape them just the way you want, trim, reverse, fade in/fade out, normalize slices you find too quiet even at max volume, etc. Or you can create weird ‘beat repeat’ glitches by making very short loops on individual slices.
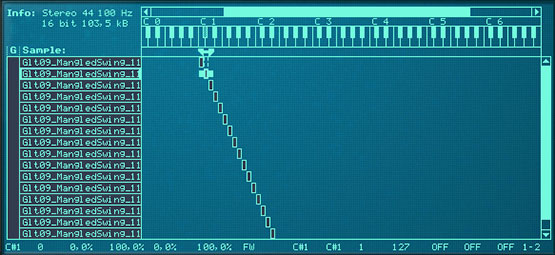
Here’s how you do it: Create a Dr. OctoRex. Load up the REX file of your choice. Copy the notes to the Track. Then create an NN-XT and move or copy the OctoRex notes to the empty NN-XT track. Now, open the patch browser and load the same REX file into the NN-XT. The slices will show up in the NN-XT Editor window like this: (figure 9)
Now you have REX playback with the option to edit each slice. Simply select a sample on the NN-XT Editor display, and then right-click and select “Edit Sample” or hold [Alt/Option] while clicking on the Sample button. (figure 10)
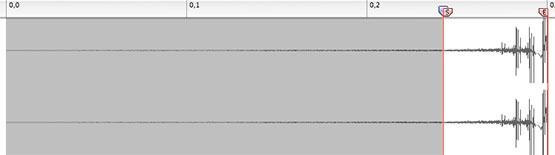
Here’s one of those samples that are difficult to use when reversed, because it’s about 10% percussive sound and the rest is just a hint of reverb. So what we’ll do is reverse it and trim off most of the ‘tail’ by using the Crop function… (figure 11)
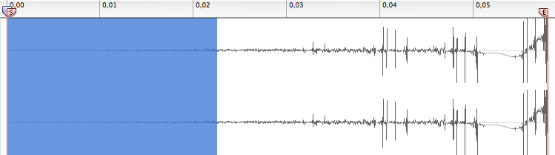
…and then, create a short fade-in on the trimmed tail by highlighting the beginning of the slice and clicking the Fade In button… (figure 12)
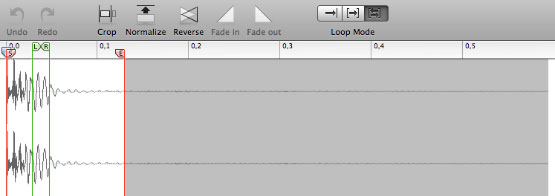
…and now we have a more manageable reversed slice.
As mentioned earlier, another thing you can do with slices is to create very short loops to get that glitchy digital hiccup feel. It might look something like this: (figure 13)
Here’s an example of a factory soundbank REX loop where individual slices have been reversed and/or looped in the editor. Bars 1-2 and 5-6 play the original loop for comparison, bars 3-4 and 7-8 feature the tweaked loops played by the NN-XT.
Example File: Glitch.rns
Everything but the Kitchen Sink
As a quick demonstration of what you can do with just a mic and whatever potential sampling sources you have lying around, I went to the kitchen and spent half an hour recording random stuff with a Sennheiser e945 hooked up to an Apogee Duet. The song file below is based entirely on the following self-contained samples:
Bass drum: Large empty drawer closing
Snare drum: Small drawer (full of utensils) closing
Closed HH: Water tap, short burst
Open HH: Water tap, long burst
Additional percussion: Scissors, more drawers closing
Bass 1: Microwave starting up
Bass 2: Slapping the top of the microwave
Bells: Butterknife against large beer glass
Poly synth: Microwave “ready beep”
FX drone: Dishwasher starting up
Example File: Kitchen.rns
Sampling may seem a chore at first, with lots of trial and error, but it’s actually quite easy, and ultimately it’s rewarding to make music with your own unique sounds. When someone remarks “cool snare, where’d you get that?” you’ll be able to say “oh, that’s just me vacuuming up some Lego bricks”. So grab a mic and go on a quest for hidden sonic treasures in your garage, your kitchen, your car… but go easy with the bathroom samples.
Text by Fredrik Hägglund


