
By Matt Piper

Welcome to the first article in the Record U series – this article will teach basic techniques for recording electric guitar, with information about mic’ing guitar amps, and also recording directly into Reason with no microphones or amplifiers at all, using Reason’s built-in Line 6 Guitar Amp device. Lets get started with some general tips for recording your guitar amp!
Use a flashlight
In many combo amplifiers, the speaker is not actually in the center of the cabinet, and may not be easily visible through the grill cloth. In this case, shining a flashlight through the grill cloth should allow you to easily see the position of the speaker so you can place your microphone accurately.
Recording in the same room as your amplifier
Recording close to your amplifier (especially with your guitar facing the amplifier) can have the benefits (especially at high gain settings) of increasing sustain and even achieving pleasant, controlled harmonic feedback. This is due to a resonant feedback loop between the amplifier, the speaker, your guitar pickups, and your guitar strings. You may also be able to achieve this effect when recording directly into the computer, if you are playing in the control room with the studio monitors (not headphones!) turned up loud enough. While it may sometimes be desirable to play guitar while separated from the amp (perhaps because the amp is in a bathroom, other separate room, or isolation box to keep it from bleeding into other instrument microphones when recording a live band), you will lose the opportunity for this particular feedback effect.
My guitar tone sounds so much brighter on the recording than it does when I listen to my amp!
Quite often (especially with combo amplifiers, where the amp and speaker are both in the same cabinet), guitarists get used to the sound of standing several feet above their speaker, while the speaker faces straight out parallel to the floor. Because of this, much of the high frequency content coming from the speaker never reaches your ears. If you start making it a habit to tilt the amp back, or put the amp up on a stand or tilted back on a chair so that the speaker is pointed more toward your head than your ankles, you will begin becoming accustomed to the true tone of your amp, which is the tone the microphone will record, and the tone that members of a live audience will hear. This may initially require you to make adjustments to your tone—but once you have achieved a tone you like with this new setup, you can be confident that the sound you dialed in will be picked up by a properly placed microphone.
Proximity effect
When a microphone with a cardioid pattern (explained later in the Large Diaphragm Condenser Microphones section of this article) is placed in very close proximity to the sound source being recorded, bass frequencies become artificially amplified. You may have heard a comedian cup his hand around the microphone with the mic almost inside his mouth to make his voice sound very deep when simulating “the voice of God” (or something like that). This is an example of the proximity effect. This effect can result in a very nice bass response when placing a microphone close to the speaker of your guitar cabinet or combo amplifier. In fact, the Shure SM57 is designed to make use of this effect as part of its inherent tonal characteristics.
On-axis vs. off-axis
You will see these terms mentioned later in my descriptions of the mic setup examples. On-axis basically means that the microphone element is pointed directly at the sound source (sound waves strike the microphone capsule at 0 degrees). Off-axis means (when mic’ing a speaker) that the microphone element is aimed at an angle rather than straight at the speaker (so the sound waves strike the microphone capsule at an angle). On-axis will give you the strongest signal, the best rejection of other sounds in the room, and a slightly brighter sound than off-axis. I usually mic my amp on-axis, with the mic (my trusty Shure SM57) somewhere near the edge of the speaker. However, this is not “the one right way.” The right way is the way that sounds best to you. I hope that the following examples will help you find your own path to the tone you are looking for.
Recording Guitar through an Amplifier with Different Mic Setups (Examples)
The following recordings were made with a Gibson Les Paul (neck pickup) played through a Fender Blues Junior combo tube amp sitting on a carpeted floor (propped back a bit). A looping pedal was used so that the exact same performance could be captured with each microphone setup. The amp was turned up to a somewhat beefy, but not deafening volume.
The Shure SM57 Microphone: A Guitarist’s Trusty Friend
For recording guitar amplifiers, it is hard to find better bang-for-your-buck than the Shure SM57 dynamic microphone. It is an extremely durable microphone, and it can handle very high volume levels. When recording guitar amps, I recommend placing this mic just as close as you can to the speaker. In the following recordings, I have placed it right up against the speaker grill cloth.
— This recording was made with the SM57 facing the speaker straight on (on-axis), with the microphone placed at the outer edge of the speaker.

— This recording was made with the SM57 facing the speaker straight on (on-axis), with the microphone placed directly in the center of the speaker. You should be able to easily notice that this recording has a brighter tone than the recording made at the edge of the speaker. Since more high frequency content has been captured, the slight noise/hiss from the looping pedal is more noticeable.

— This recording was made with the SM57 placed directly in the center of the speaker, but facing the speaker off-axis at a 45-degree angle. When compared to the preceding center/on-axis recording, this recording is a bit warmer. The noise floor is a bit less noticeable, and the high frequency content is dialed down a bit.
— This recording was made with the SM57 placed at the edge of the speaker, at a 45-degree angle (pointing toward the center of the speaker). This is the warmest of all the microphone positions recorded here. It has slightly less high-end “sizzle” than the first recording (SM57_edge_straight.mp3).
Though I have not included an example, I will mention that some people even simply hang the microphone so that the cable is draped over the top of the amp and the microphone hangs down in front of the speaker pointing directly at the floor. In this position, the type of floor makes a difference in the tone (wood, concrete, tile, or carpeted floors will result in different sounds), as well as the distance between the speaker, mic, and floor. This arrangement is likely to have the least amount of highs of anything discussed thus far, and will have less rejection of other sounds in the room (if you are recording in the same room as the rest of a band, this method would pick up more sound from the other instruments). I tend to avoid this method myself, but if you are short of mic stands, it could be helpful—and I would not discourage you from experimenting. It may turn out to be just the sound you were looking for.
Large Diaphragm Condenser Microphones
For comparison, I have also recorded the same performance with an M-Audio Sputnik tube microphone. Though not as famous as some microphones by Neumann or AKG, this is a high-quality, well-reviewed large diaphragm tube-driven condenser microphone.
M-Audio states that what they were going for was something with tonal characteristics somewhere between a Neumann U47 and an AKG C12. For the following recording, I have placed the Sputnik directly in front of the center of the speaker, on-axis, 10 inches from the front of the speaker.
— This microphone has switchable polar patterns (including omindirectional, figure eight, and cardioid). For the recording above, I used the cardioid pattern. This means that the microphone favors sounds directly in front of it, while picking up less sound from the sides and rejecting sounds coming from behind it. The SM57, as well as the AKG C 1000 S microphones used later in this article also have cardioid pickup patterns.
What I hope will impress you here is how for this application (recording a guitar amp), the $100 SM57 compares quite favorably $800 Sputnik! For recording vocals or acoustic instruments, the Sputnik wins hands down—but for recording guitar amps, the SM57 is an amazing value and hard to beat at any price.
Room mics
Though one might often mic a room with a single microphone (perhaps a large diaphragm condenser), I have opted to use a stereo pair of small diaphragm condensers: specifically the AKG C 1000 S (an older dark gray pair). These microphones currently have a street price around $280/each USD. I attached them to a stereo mount on a single mic stand, one microphone just on top of the other, with the microphone elements arranged 90 degrees from each other (an XY pattern). This is to minimize the chance of phase problems I might otherwise encounter that could potentially cancel out some frequencies and change the tone of the recording in strange ways.

For the following recording, the mic stand was placed about 8 feet from the amplifier, at roughly the height a standing human’s ears would be.
— This recording is not immediately as pleasing to my ears as the other recordings. However, when mixed with one of the close-mic’ed recordings, its usefulness becomes clearer.
— Before listening to the next MP3, I suggest prepping your ears by listening again to the SM57 45 degree edge recording
— In this recording, the SM57 recording and the stereo room mic recording are mixed almost evenly (weighted just slightly in favor of the SM57 recording). By adding the room mic pair, there is a bit of depth and also a bit of high-end definition added to the recording. There is more of a sense of space. Of course, this effect could be simulated by adding a digital room reverb (such as the RV7000 Advanced Reverb that comes with Reason). Digital reverbs allow you to simulate rooms that may have more pleasing acoustics or larger dimensions than those of a “bedroom studio” or other room in a house or apartment.
Recording guitar directly into Reason using the built-in Line 6 Guitar Amp device
This is where things get really simple, quick, and easy!
The built-in Line 6 Guitar Amp device has emulations of all types of different amps and speaker cabinets—much more variety than a single tube amp could provide. And of course you can record at any volume level (or through headphones), so apartment-dwelling musicians won’t be visited by the police in the middle of the night for disturbing the peace!
I recorded the same part (actually ditched the looping pedal and played a fresh take for this) into Reason. I plugged the same guitar directly into my audio interface. No effects pedals of any kind were used. Here are the steps I followed, which basically explain how to record a guitar track in Reason:
| 1. Open a new song in Reason, and Create an Audio Track | 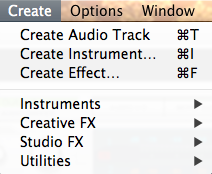 |
| 2. Select Line 6 Guitar Amp in the Tool Window and click the Create button. |  |
| 3. Click on the Line 6 Guitar Amp display, and select Clean Dumble Twin from the pop-up menu. |  |
| 4. Click the Enable Tuner button (looks like a tuning fork!) in Audio Track 1 in the Sequencer and tune your guitar! |  |
| 5. Set a comfortable tempo by clicking and dragging up or down in the tempo window. |  |
| 6. Turn on the Click, and then turn on Precount if you would like a count-in before recording begins (the duration of which can be set to be anywhere from 1 to 4 bars in the Options menu). |  |
| 7. Click record! |  |
Here is my result:

I must say that the tone from the Line 6 Guitar Amp sounds quite good to me, even after listening to the Fender tube amp all day!
Of course, there are several totally shredding tones available, much wilder than the warm (but rather tame) tone used here. And for you knob-twiddlers out there, the presets are just starting points: The Line 6 Guitar Amp device has familiar controls just like on a standard guitar amp, so that you can easily adjust drive, bass, middle, treble, and presence just the way you like, while mixing and matching amps and cabinets to your heart’s content. Experiment and find what works best for you! Of course if you create a tone you like, you can easily save it as a user preset. And later if you are mixing and decide you’d like to try something else, you can change to a different preset completely. It doesn’t matter what Line 6 preset you use when recording—only your clean unaffected signal is actually recorded to your hard drive. You can change the tone anyway you like afterward.
Matt Piper is a guitarist/keyboardist and author of Reason 4 Ignite! His favorite Reason feature? “Reason has the easiest to use, best sounding audio time stretching I have ever tried.”


